There are a ton of guides online for how to root a Pixel 8, but hopefully this is the most straight forward.
- Enable developer mode by going to “About Phone” in your settings, and tapping the “Build number” 8 times until it pops up.
- Then, turn on “USB debugging” and “OEM Unlocking”. If you just got your phone and “OEM Unlocking” is greyed out, wait a day with it connected to internet and hopefully it unlocks.
- Download platform tools here: https://developer.android.com/tools/releases/platform-tools, unzip that bad boy somewhere.
- Download the latest image for your Pixel device here (You’ll want to navigate to “shiba” for Pixel 8 on the right, and pick the one lowest on the list with no specific carrier ideally): https://developers.google.com/android/images#shiba
- Now, with the platform tools, you can ensure you have fastboot with “adb reboot bootloader”, and “fastboot devices” to put it into fastboot.
- We’re going to use PixelFlasher to do this, so get that here: github.com/badabing2005/PixelFlasher
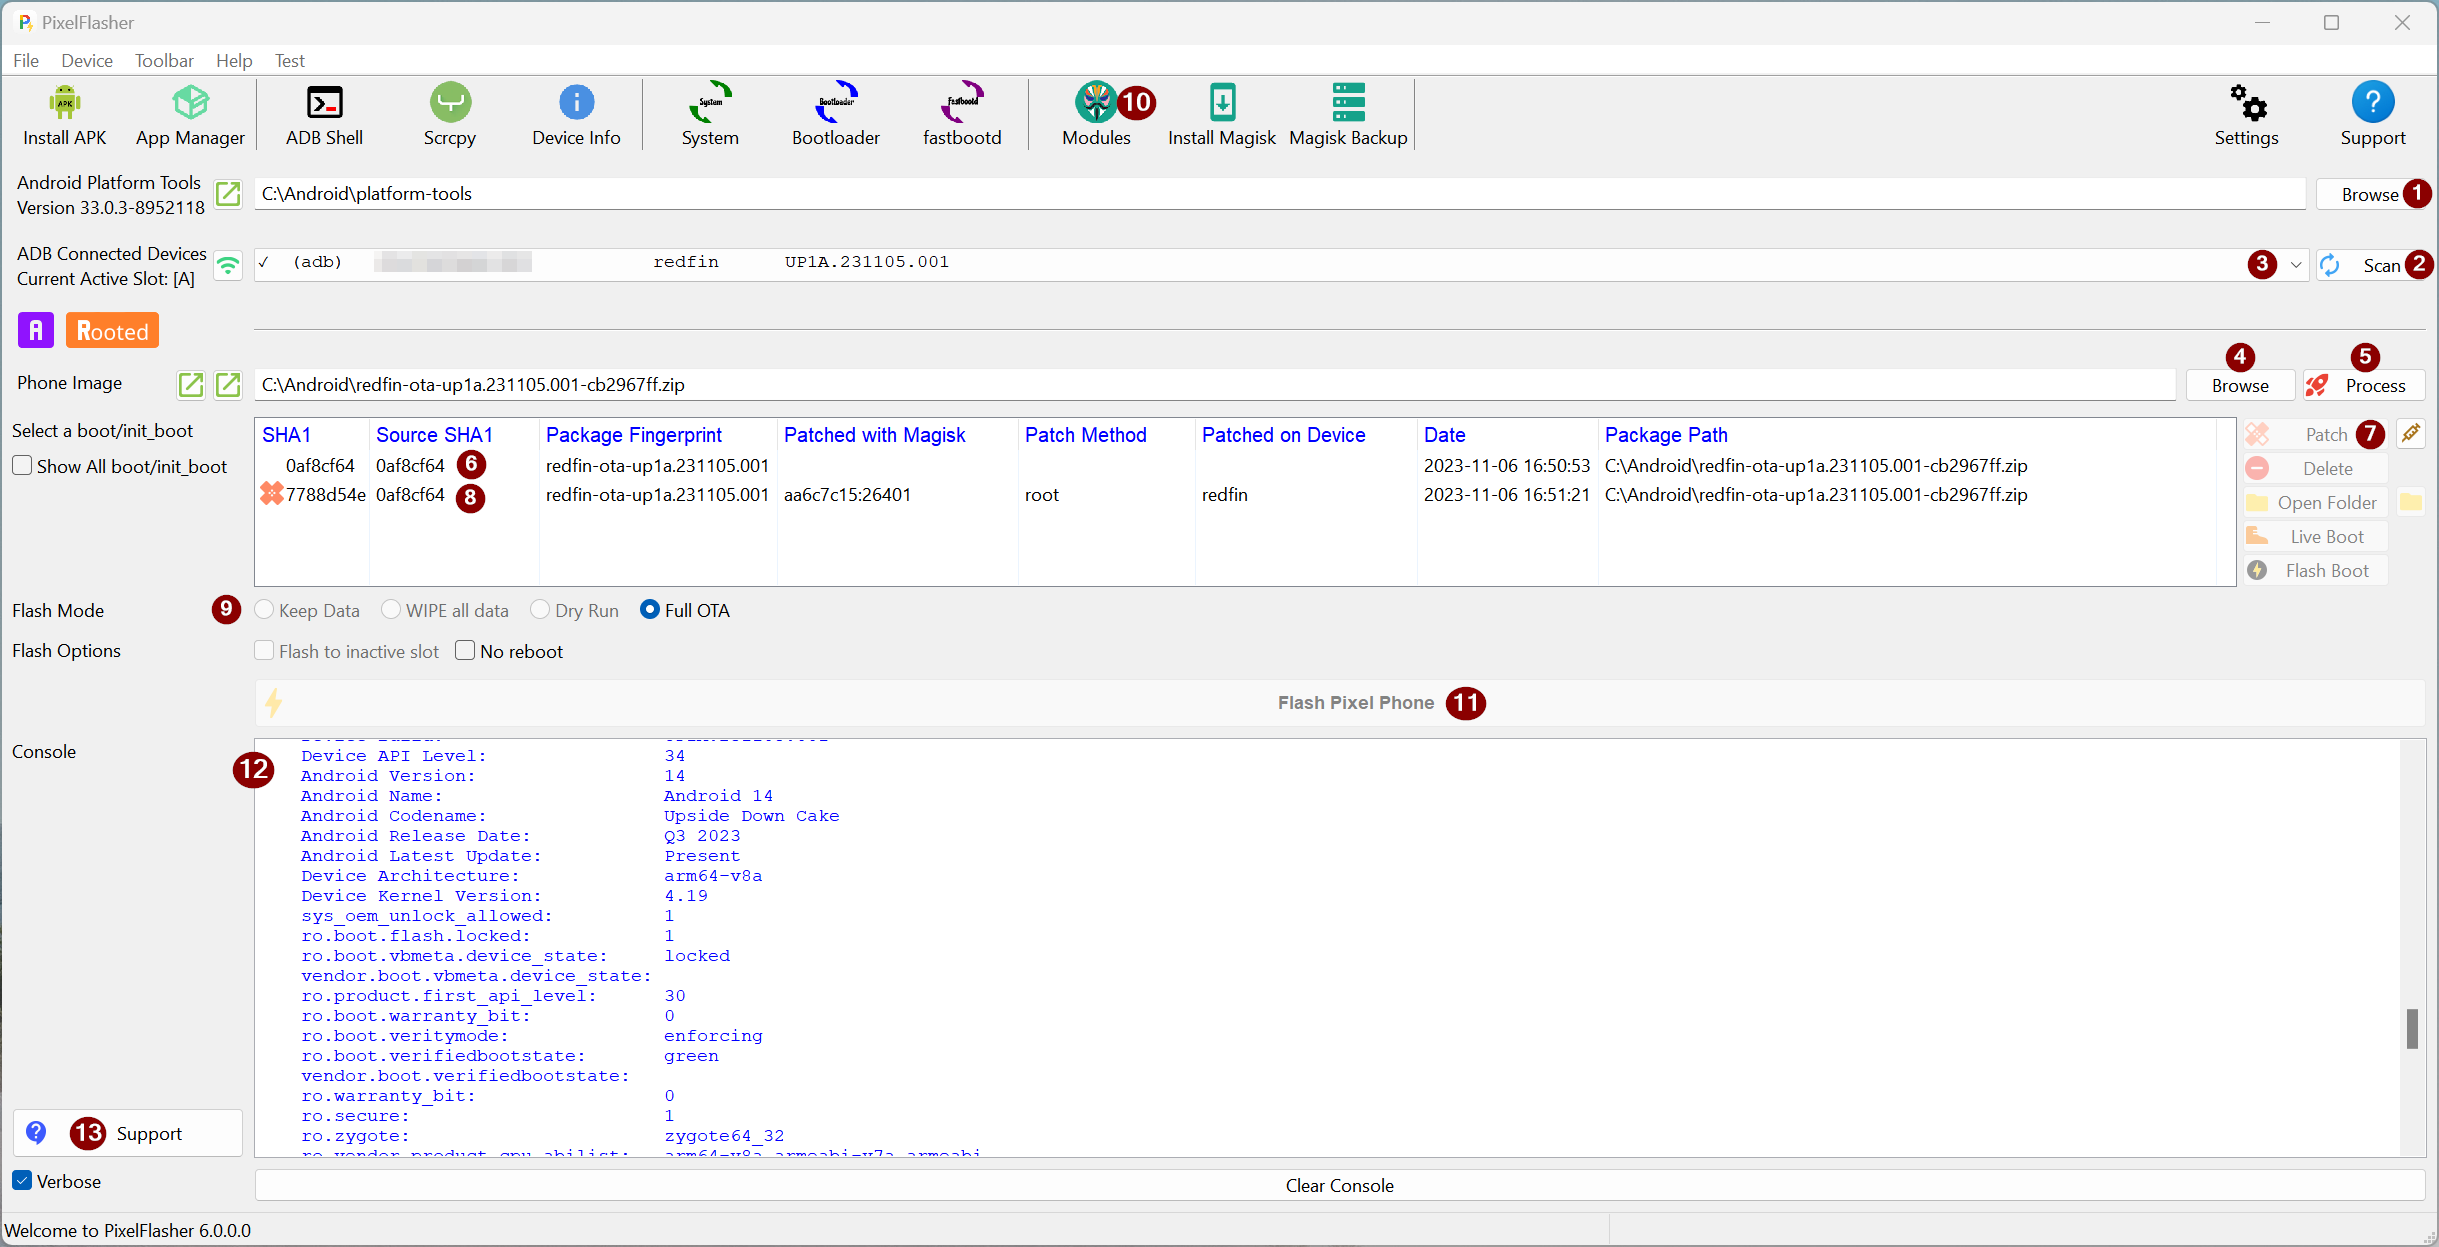
- Follow their guide by selecting that folder you put your platform tools in, scan for the device, browse for the image you downloaded earlier, and then hit “Process”. Then hit Patch, select a Flash Mode (I did WIPE), and hit flash phone.
- If your “Patch” button is greyed, you might need to install Magisk under “Modules” at the top. Or, you might just want to start the phone if you’re in the bootloader.
- If your “Patch” button is greyed, you might need to install Magisk under “Modules” at the top. Or, you might just want to start the phone if you’re in the bootloader.
- Once it boots up install root checker to see if it rooted, otherwise install Magisk from here: github.com/topjohnwu/Magisk. I would recommend downloading the canary version.
- Under Magisk, you can hit install and select “Direct Install”.
Honestly this is the way I found to work. However, you can probably skip PixelFlasher and patch the image directly via Magisk. Good luck.
Making rooted status/Magisk a bit more obfuscated:
If you need to hide the fact that your phone is rooted, or that Magisk is installed, because some apps are sensitive to that, do the following:
- Enable Zygisk in the settings of Magisk
- Install the following two modules (by downloading the zip, and installing under the “modules” tab in Magisk):
- Under settings of Magisk, hide the application by changing it to a different name
- Do not enforce DenyList (Shamiko will do a better job than the built in DenyList)
- Download Yet Another Safetynet Attestation Checker (YASNAC) and run the attestation, you should pass basic integrity and CTS profile match, with no recommendations at the bottom.
- That’s all, if you need, restart your phone and wipe the storage for the play store, and you should be good to go.
Running commands as root via ADB
So, once you have rooted your phone, you can run commands via ADB with the following command:
.\adb.exe shell "su -c <your command here>"

#For example, running frida-server would be..
.\adb.exe push frida-server /data/local/tmp
.\adb.exe shell "su -c /data/local/tmp/frida-server"
Other resources I found were useful:
XDA has great guides, this one was OK – https://xdaforums.com/t/how-to-install-magisk-on-the-pixel-8.4662280/#post-89615369
Frida server releases (you’ll want arm64 server for Pixel 8): https://github.com/frida/frida/releases
Youtube has how to do this only via Magisk which I probably should have tried too heh:
